Open a Form
Use this effect to open a form where the user can fill out and save data for a new or existing objects, work with data in a table, or view the content of a Report or a web page.
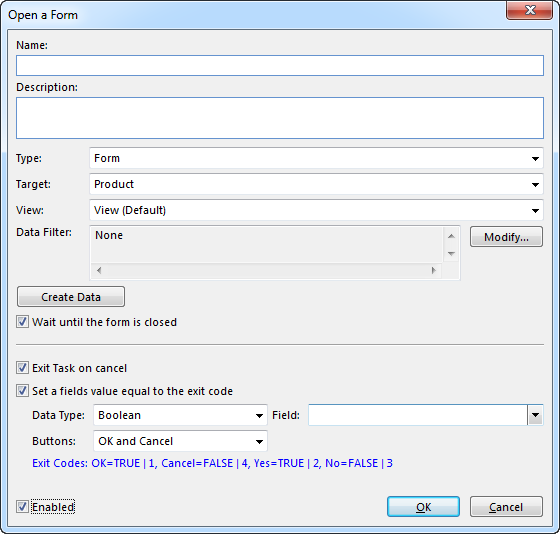
Form
Open a Form, to create or modify data.
- In the Name box, optionally type a name. The name is displayed in the action tree, if a name is not entered, a summary of the effect is displayed.
- In the Description box, optionally type a description.
- In the Type box, select Form.
- In the Target box, select a form.
- In the View box, select a view from the form selected in the Target box.
- The Data Filter specifiy which data the form loads when opened. It is possible to change the default data filters for public data sources in the form. Click Modify, and then for each of the data sources in the list, click Modify to specify a data filter.
- To create new objects when the form is opened, click Create Data, and then for each data source, click Add. In the Create Object In list, select a data source from the form. In the Default Values box click ... and assign values to the groups and fields in the data source. If the form is opened in a modal window the created data can be returned to the task when the form is closed, to achieve this the data source in the task to receive the data must be specified through data binding. In the Copy Object Back To box click ... and select a data source to receive the data.
- If you want to execute succeeding actions immediately without waiting for the user to close the form, click to clear the Wait until the form is closed check box. Note that if the data source not is persisted, you can not clear this option. When this option is selected. the form is opened in a modal window.
- Select the Exit Task on cancel check box if you do not want to execute suceeding effects if the user chooses the Cancel button in the form. This option is only available if the Wait until the form is closed check box is selected.
- To store which button is chosen by the user, click Set a fields value equal to the exit code. You can either store the response as a boolean value or an integer value. See the article Dialog Box Exit Codes for an overview of exit codes. Only available if the Wait until the form is closed check box is selected.
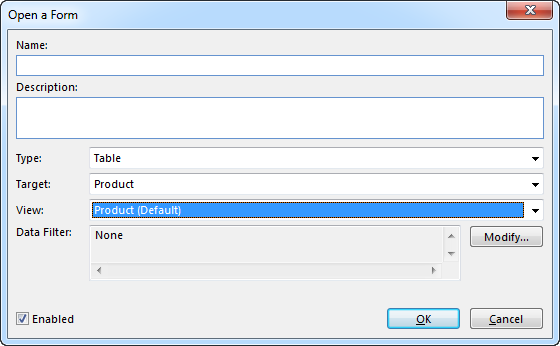
Table
Open a Table, to list and work with data.
- In the Name box, optionally type a name. The name is displayed in the action tree, if a name is not entered, a summary of the effect is displayed.
- In the Description box, optionally type a description.
- In the Type box, select Table.
- In the Target box, select a table.
- In the View box, select a view from the table selected in the Target box.
- The Data Filters specify which data the table loads when opened. It is possible to change the default data filters for public data sources in the table. Click Modify, and then for each of the data sources in the list, click Modify to specify a data filter.
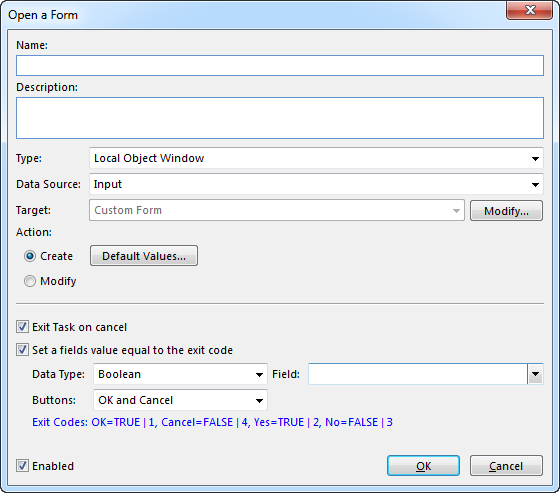
Local Object Window
Open a simple form, to create or modify a custom data source.
- In the Name box, optionally type a name. The name is displayed in the action tree, if a name is not entered, a summary of the effect is displayed.
- In the Description box, optionally type a description.
- In the Type box, select Local Object Window.
- In the Data Source box, select a custom data source.
- In the Target box, Custom Form is pre-selected select. To modify the custom form, click Modify. Enter a title and description for the form in the appropriate boxes. In the Fields list select a field and click Modify to open the Field Properties dialog. To change the data filter for the field, in the Data Filter box, click Modify and specify the data filter. This option is only available for complex data types. To hide the field in the custom form, click to clear the Visible check box. To change the order of the fields, click a field and click Move Up or Move Down.
- To create a new custom object when the form is opened, in the Action section click Create. To assign default values for the new object, click Default Values, and assign values to the groups and fields in the data source. To modify an existing custom data source object, in the Action section click Modify.
- Select the Exit Task on cancel check box if you do not want to execute suceeding effects if the user chooses the Cancel button in the form. This option is only available if the Wait until the form is closed check box is selected.
- To store which button is chosen by the user, click Set a fields value equal to the exit code. You can either store the response as a boolean value or an integer value. See the article Dialog Box Exit Codes for an overview of exit codes. Only available if the Wait until the form is closed check box is selected.
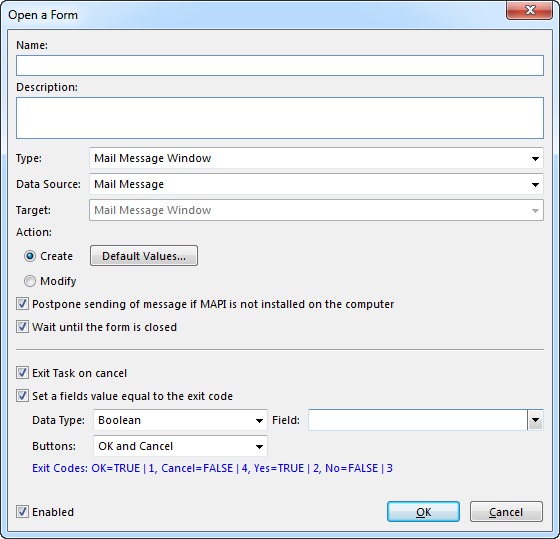
Mail Message Window
Open Microsoft Outlook if it is installed on the computer, or otherwise open a simple mail message window.
- In the Name box, optionally type a name. The name is displayed in the action tree, if a name is not entered, a summary of the effect is displayed.
- In the Description box, optionally type a description.
- In the Type box, select Mail Message Window.
- In the Data Source box, select a mail message data soure.
- In the Target box, Mail Message Window is automatically selected.
- To create a new mail message object when the form is opened, in the Action section, click Create. To assign default values for the new object, click Default Values, and assign values to the groups and fields in the data source. To modify an existing mail message data source, in the Action section, click Modify.
If MAPI is not installed on the computer, you can choose to postpone to send the message. To do this, select the Postpone sending of message if MAPI is not installed on the computer check box. You can send the message in a suceeding effect of type Create a Mail Message.
If you want to execute succeeding actions immediately without waiting for the user to close the form, click to clear the Wait until the form is closed check box. Note that if the data source not is persisted, you cannot clear this option. When this option is selected. the form is opened in a modal window.
- Select the Exit Task on cancel check box if you do not want to execute suceeding effects if the user chooses the Cancel button in the form. This option is only available if the Wait until the form is closed check box is selected.
- To store which button is chosen by the user, click Set a fields value equal to the exit code. You can either store the response as a boolean value or an integer value. See the article Dialog Box Exit Codes for an overview of exit codes. Only available if the Wait until the form is closed check box is selected.
Mail Message Considerations
Note! Leave the From address field blank for mail messages sent from an MS Outlook client. The From address i automatically filled out with the correct address when the mail message is opened in the MS Outlook client. Even if you specify a valid SMTP-address, MS Outlook may not be able to look up the address in the address book. You may also experience problems concerning privileges when the mail message is sent.
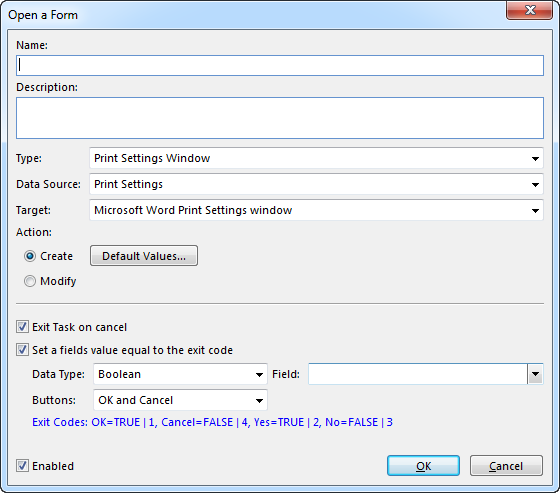
Print Settings Window
Open the standard windows print settings dialog.
- In the Name box, optionally type a name. The name is displayed in the action tree, if a name is not entered, a summary of the effect is displayed.
- In the Description box, optionally type a description.
- In the Type box, select Print Settings Window.
- In the Data Source box, select a print settings data soure.
- In the Target box, select Microsoft Word Print Settings window or Microsoft Excel Print Settings window to specify which type of print settings window to use.
- To create a new print settings object when the form is opened, in the Action section, click Create. To assign default values for the new object, click Default Values, and assign values to the groups and fields in the data source. To modify an existing print settings data source, in the Action section, click Modify.
- Select the Exit Task on cancel check box if you do not want to execute suceeding effects if the user chooses the Cancel button in the form. This option is only available if the Wait until the form is closed check box is selected.
- To store which button is chosen by the user, click Set a fields value equal to the exit code. You can either store the response as a boolean value or an integer value. See the article Dialog Box Exit Codes for an overview of exit codes. Only available if the Wait until the form is closed check box is selected.
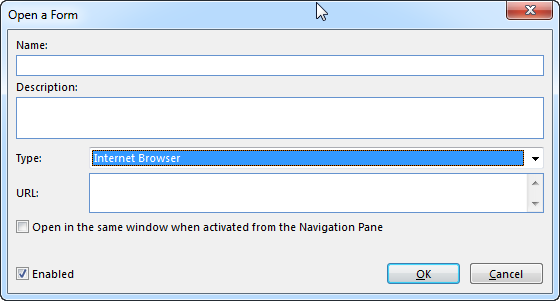
Internet Browser
Open the default internet browser.
- In the Name box, optionally type a name. The name is displayed in the action tree, if a name is not entered, a summary of the effect is displayed.
- In the Description box, optionally type a description.
- In the Type box, select Internet Browser.
- In the URL box type an URL. You can generate a dynamic URL by inserting fields from your data sources as part of the URL.
- By default, the URL is opened in a new browser window. To open the URL in the main window when the effect is activated from a shortcut to a Task in the Navigation Pane, click Open in the same window when activated from the Navigation Pane.
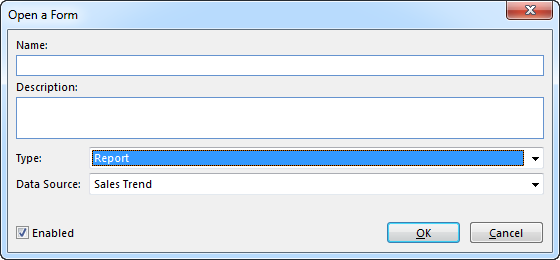
Report
Open a Report.
- In the Name box, optionally type a name. The name is displayed in the action tree, if a name is not entered, a summary of the effect is displayed.
- In the Description box, optionally type a description.
- In the Type box, select Report.
- In the Data Source box, select a report data source.
See Also